
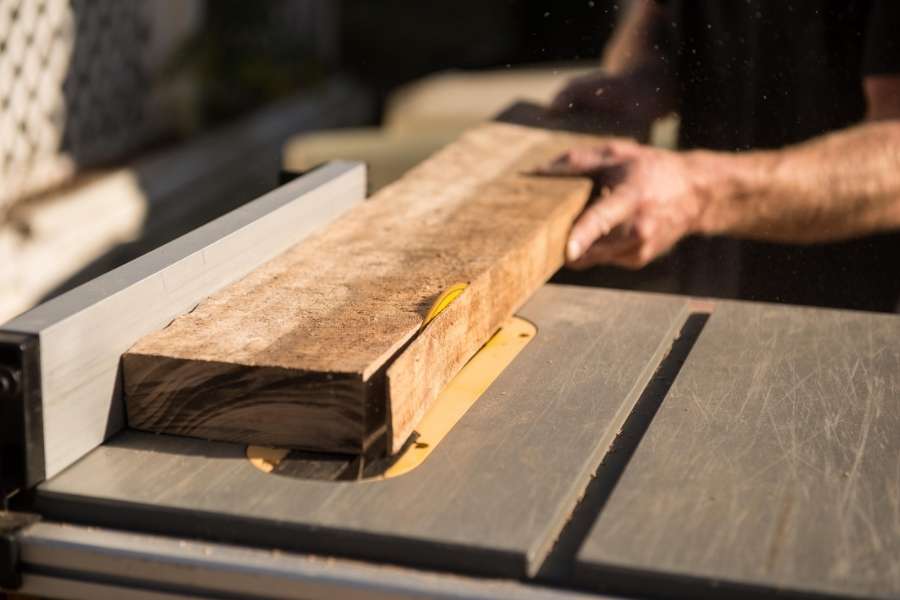
The roar of a spinning arbor always gets your heart racing. It offers pure building potential, but it hides massive kinetic force. One slip turns this tool into a dangerous table saw.
Most newcomers trust their reflexes, but wood holds internal tension. When grain pinches, things fly across the shop instantly. Learning how to use a table saw safely protects your hands for life.
Treat the machine with deep respect every single day. Let us walk through five critical errors that put your fingers at risk.
1. Operating Naked: Removing Guards and Splitters from Your Setup
Beginners often drop factory guards right into the trash bin. They see online makers work bare-handed and copy that habit. This reckless choice instantly creates a dangerous table saw in your garage. Passive safety parts protect your body from sudden wood movement. Ripping timber releases internal tree stress without warning. Without support, the wood kerf pinches tight behind the cut. That pinching action grabs the rising teeth of the blade. When steel hooks wood, pure violence follows within milliseconds. Many makers prepare boards for modern woodworking joinery and panel alignment without realizing that raw stock moves unpredictably during ripping.
Ascending teeth lift timber right off the cast iron surface. The machine hurls that board straight back at highway speeds. This explosive reaction is called kickback by experienced craftsmen. The board moves faster than any human nervous system reacts. A pinched workpiece launches in less than fifty milliseconds. Learning how to prevent table saw kickback starts with proper hardware. A simple steel fin prevents the kerf from closing. Never make a regular through-cut without this device mounted. Keep your factory guard attached for all standard ripping work. It creates a physical barrier between fast steel and skin.
The Physics of Sudden Workshop Kickback
Ascending teeth lift timber right off the cast iron surface. The machine hurls that board straight back at highway speeds.
This explosive reaction is called kickback by experienced craftsmen. The board moves faster than any human nervous system reacts. A pinched workpiece launches in less than fifty milliseconds.
Learning how to prevent table saw kickback starts with proper hardware. A simple steel fin prevents the kerf from closing. Never make a regular through-cut without this device mounted.
Keep your factory guard attached for all standard ripping work. It creates a physical barrier between fast steel and skin.
Why a Riving Knife Beats an Old Splitter
Older machines use a fixed fin bolted to the base. This classic splitter stays stationary when you lower the arbor.
That rigid mount leaves a massive gap during shallow cuts. You must unbolt it completely to cut dadoes or grooves. Modern tools solve this design flaw with floating brackets.
A true riving knife moves up and down with the arbor. It maintains a tight gap right behind the teeth. This close clearance blocks the wood from pinching the rear teeth.
Always check this clearance before you flip the power switch. It remains your primary defense against sudden material bind.
2. Pushing Your Luck: Feeding Narrow Stock with Bare Hands
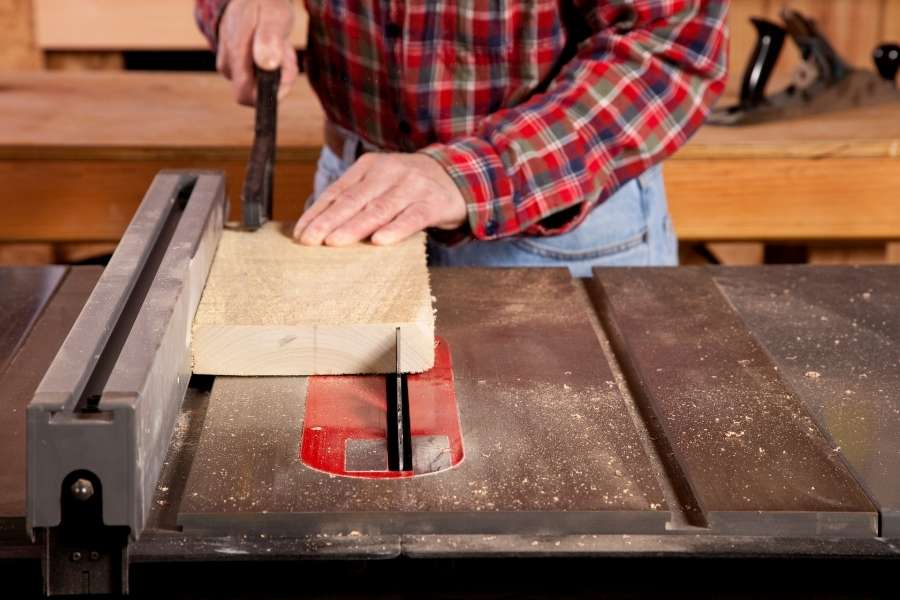
Guiding a two-inch strip with bare fingers invites disaster. Wood contains hidden voids, knots, and wild grain pockets. If the grain splits, your hand drops directly into teeth. Human balance shifts when raw boards stick or jump unexpectedly. That momentary wobble turns a good day into an emergency visit. Running stock without control defines a dangerous table saw workflow. Practicing fundamental joinery methods for beginners requires perfectly square cuts that you should never risk feeding by hand. Smart woodworkers keep their fingers far away from moving steel. Treat the red table insert like an active fire zone. Never allow your bare skin to cross that border.
Scrap wood cutoffs often fail as proper feeding aids. Notched sticks give forward drive but offer zero downward pressure. A narrow pushstick easily slips off wet or hard lumber. When it slips, your chest falls forward toward the cut. Modern shops use broad gripper blocks with sticky rubber soles. These blocks lock your downward, forward, and lateral pressure together. They hold thin strips firmly flat against the table top. Keep several push devices right next to your front rail. Pick up your feed tool before starting the cut sequence. Reaching across moving teeth to grab one invites catastrophe.
Picking the Best Feeding Tools for Every Cut
Scrap wood cutoffs often fail as proper feeding aids. Notched sticks give forward drive but offer zero downward pressure.
A narrow pushstick easily slips off wet or hard lumber. When it slips, your chest falls forward toward the cut. Modern shops use broad gripper blocks with sticky rubber soles.
These blocks lock your downward, forward, and lateral pressure together. They hold thin strips firmly flat against the table top. Keep several push devices right next to your front rail.
Pick up your feed tool before starting the cut sequence. Reaching across moving teeth to grab one invites catastrophe.
3. The Fence Trap: Crosscutting with the Wrong Guides
Many beginners view the rip guide as a universal stop. They set the board against the metal bar for crosscuts. This single habit produces a notoriously dangerous table saw setup.
Crosscuts have short bearing edges against the guide face. The cutoff twists into the gap between fence and teeth. That trapped block binds instantly and launches toward your ribs.
Never combine a miter gauge and rip fence directly. That trapped wooden offcut has nowhere to go but backward. It turns an innocent project into a dangerous shooting gallery.
A dedicated wooden sled completely changes your shop workflow. It slides inside the miter tracks using parallel hardwood runners. The timber sits fully supported across the entire cut line. Both halves ride together safely past the sharp blade. Material cannot twist or bind against an outside fence surface. Add a stand-off block to your guide for duplicate lengths. Position this small wood block well before the cut path. The stock releases clearance before teeth touch the wood fibers. This simple setup eliminates wood pinch during repeated cuts. It turns scary small crosscuts into relaxing and repeatable tasks.
Building a Simple Crosscut Sled for Flawless Work
A dedicated wooden sled completely changes your shop workflow. It slides inside the miter tracks using parallel hardwood runners.
The timber sits fully supported across the entire cut line. Both halves ride together safely past the sharp blade. Material cannot twist or bind against an outside fence surface.
Add a stand-off block to your guide for duplicate lengths. Position this small wood block well before the cut path. The stock releases clearance before teeth touch the wood fibers.
This simple setup eliminates wood pinch during repeated cuts. It turns scary small crosscuts into relaxing and repeatable tasks.
4. The Alignment Blind Spot: Ignoring Machine Calibration
New machinery straight out of the box is rarely square. Heavy factory shipping rattles trunnions and loosens alignment bolts. Forcing lumber past a crooked cutter makes a dangerous table saw.
Misalignment causes heavy friction, black burn marks, and bogging. It also lifts the back edge of your board. That lifting motion starts the kickback chain reaction immediately.
Regular maintenance protects your projects and your bodily safety. You must check machine geometry every couple of months. Accurate tools cut better while reducing dangerous material drag.
You cannot align mechanical guides simply by eyeballing them. Buy an inexpensive dial indicator with a miter track bar. Test your arbor shaft first to ensure zero mechanical runout. Next, mark a single tooth on your primary blade. Measure that marked tooth at both front and back positions. Adjust the table until the miter slot runs dead parallel. Now check your guide fence using that same gauge. Align it parallel or set a microscopic outward angle. That tiny thousandth-inch outward relief prevents tail pinch. Your offcuts pass freely through the outfeed zone without binding.
Tuning the Trunnions and Guides with Precision Tools
You cannot align mechanical guides simply by eyeballing them. Buy an inexpensive dial indicator with a miter track bar.
Test your arbor shaft first to ensure zero mechanical runout. Next, mark a single tooth on your primary blade. Measure that marked tooth at both front and back positions.
Adjust the table until the miter slot runs dead parallel. Now check your guide fence using that same gauge. Align it parallel or set a microscopic outward angle.
That tiny thousandth-inch outward relief prevents tail pinch. Your offcuts pass freely through the outfeed zone without binding.
5. Overlooking the Essentials: Speed, Stance, and Gear
Perfect machines cannot save you from poor personal habits. How you stand dictates how you react to kickbacks. Operating without core safety principles invites sudden pain.
Motors run at precise designs matched to specific diameters. Most direct-drive motors turn around thirty-four hundred RPM. Running mismatched blades causes dangerous chatter and broken teeth.
Check the plate stamping before mounting any new disc. Match the arbor speed to the factory disc rating every time.
Never stand directly in line with the spinning steel. If a board kicks loose, you want it missing you. Stand with feet apart, keeping your body to the left. Shift your hips well away from the fence path. This stance keeps your core clear of direct projectile trajectories. Plant your feet firmly to preserve solid balance throughout feeds. Never lean over moving parts to blow away wood dust. Push completely past the splitter before hitting the power off.
Proper Body Position Keeps You Safe
Never stand directly in line with the spinning steel. If a board kicks loose, you want it missing you.
Stand with feet apart, keeping your body to the left. Shift your hips well away from the fence path. This stance keeps your core clear of direct projectile trajectories.
Plant your feet firmly to preserve solid balance throughout feeds. Never lean over moving parts to blow away wood dust. Push completely past the splitter before hitting the power off.
Wearing the Right Safety Gear in Your Workshop
Eye and ear protection remain completely non-negotiable everyday basics. Flying splinters leave the machine at hundreds of miles per hour.
Pick up certified essential safety gear for woodworkers today. Standard reading glasses shatter easily upon sudden high-velocity impact. Use Z87 rated safety glasses with wrap-around side shields.
High machine noise ruins your hearing over continuous shop years. Put on quality ear muffs before flipping the master switch.
Never wear gloves while working on a spinning machine. Cloth threads get caught in carbide teeth within a split second. That fabric pull drags your entire hand directly into disaster.
Avoid loose long sleeves, neck chains, and dangling hoodie cords. Roll your sleeves high and secure all long hair back. Clear thinking and tight clothing prevent horrific table saw accidents.
Mental Checklists for Every Workshop Cut
Pause and breathe before touching the green power switch. Take five seconds to study your exact cutting path.
Look for knots, board crown, and proper tool height. Set the teeth about one quarter inch above the timber. That low height limits exposure while clearing wood dust cleanly.
Review the common table saw safety mistakes to avoid carefully. Verify that push blocks sit within easy arm reach. Make sure the table outfeed zone stays completely clear.
If any planned setup feels unstable, stop right away. Reconfigure your clamping until you feel totally in command. Patience remains the finest safety tool in any woodshop.
Frequently Asked Questions
What should I do if a board begins burning during a rip cut?
Board burning happens when wood pinches against the plate or the feed slows down. Never try to force a stuck board forward through the cut. Hold your position firmly, turn off power, and let the arbor stop completely.
Is it safe to cut warped or twisted lumber on this tool?
Cutting warped or cupped boards directly on the cast iron table is very dangerous. The wood rocks during the feed, pinches the teeth, and causes sudden kickback. Always flatten one face and square one edge on a jointer first.
How high above the wood should the teeth sit?
Set the arbor so that one full tooth extends above the board surface. Roughly one-eighth to one-quarter inch of exposure provides clean chip ejection. Setting the height too high exposes unnecessary steel and increases injury risk.